
There are four different background tags to show you and for three of them I used some Ferro.


Another option is to just scrape a layer over one corner of the tag, using the palette knife in a schlupping fashion, Those of you who know me will know that schlupping is patting your knife into the product to get texture, just like you would if you were trying to get peaks in a meringue!
Although you really can't see it in this photo, I have actually stamped some script into the Ferro as well, I suggested that you spritz the stamp with water first, that way it is easy to remove any excess product from your stamp. You will see the script better once the Ferro has been coloured.
You can dry Ferro with a heat gun. You may find that the product bubble a bit too, but as long as they are only small bubbles, they will add to the texture.

So here we have the four tags prepared. The one on the left has been embossed in an embossing folder. and the other three all have Ferro on them. The next step is to paint them all black. I used Paperartsy's Little Black Dress Fresco Finish paint.

Tag No.1 got a paint treatment which makes it look like leather.

Using a piece of Cut'n'dry foam, I sponged Claret and Brown Shed paint over the black tag, blending them together where the two colours meet.


I sprayed tag No.3 with some watered down Fresco paint. Using a mini spray bottle, add a small amount of water to the bottle followed by your choice of paint, then shake well. If you put the paint in first, it will be tricky to mix as the paint will sit at the bottom of the bottle. Once thoroughly mixed, add more water. Don't fill the bottle completely as you will need room in the bottle to agitate the liquid for a thorough mix. I normally use about 25% paint, 75% water. Here I used Mermaid and Brown Shed with a little bit of Pumpkin Soup mixed in for good measure!

I sponged some Black Archival ink on the raised areas so that the Liquid Leaf would really pop when applied.

This is where I have to show you a photo of the finished tag as I stupidly forgot a picture pf this step!!!!

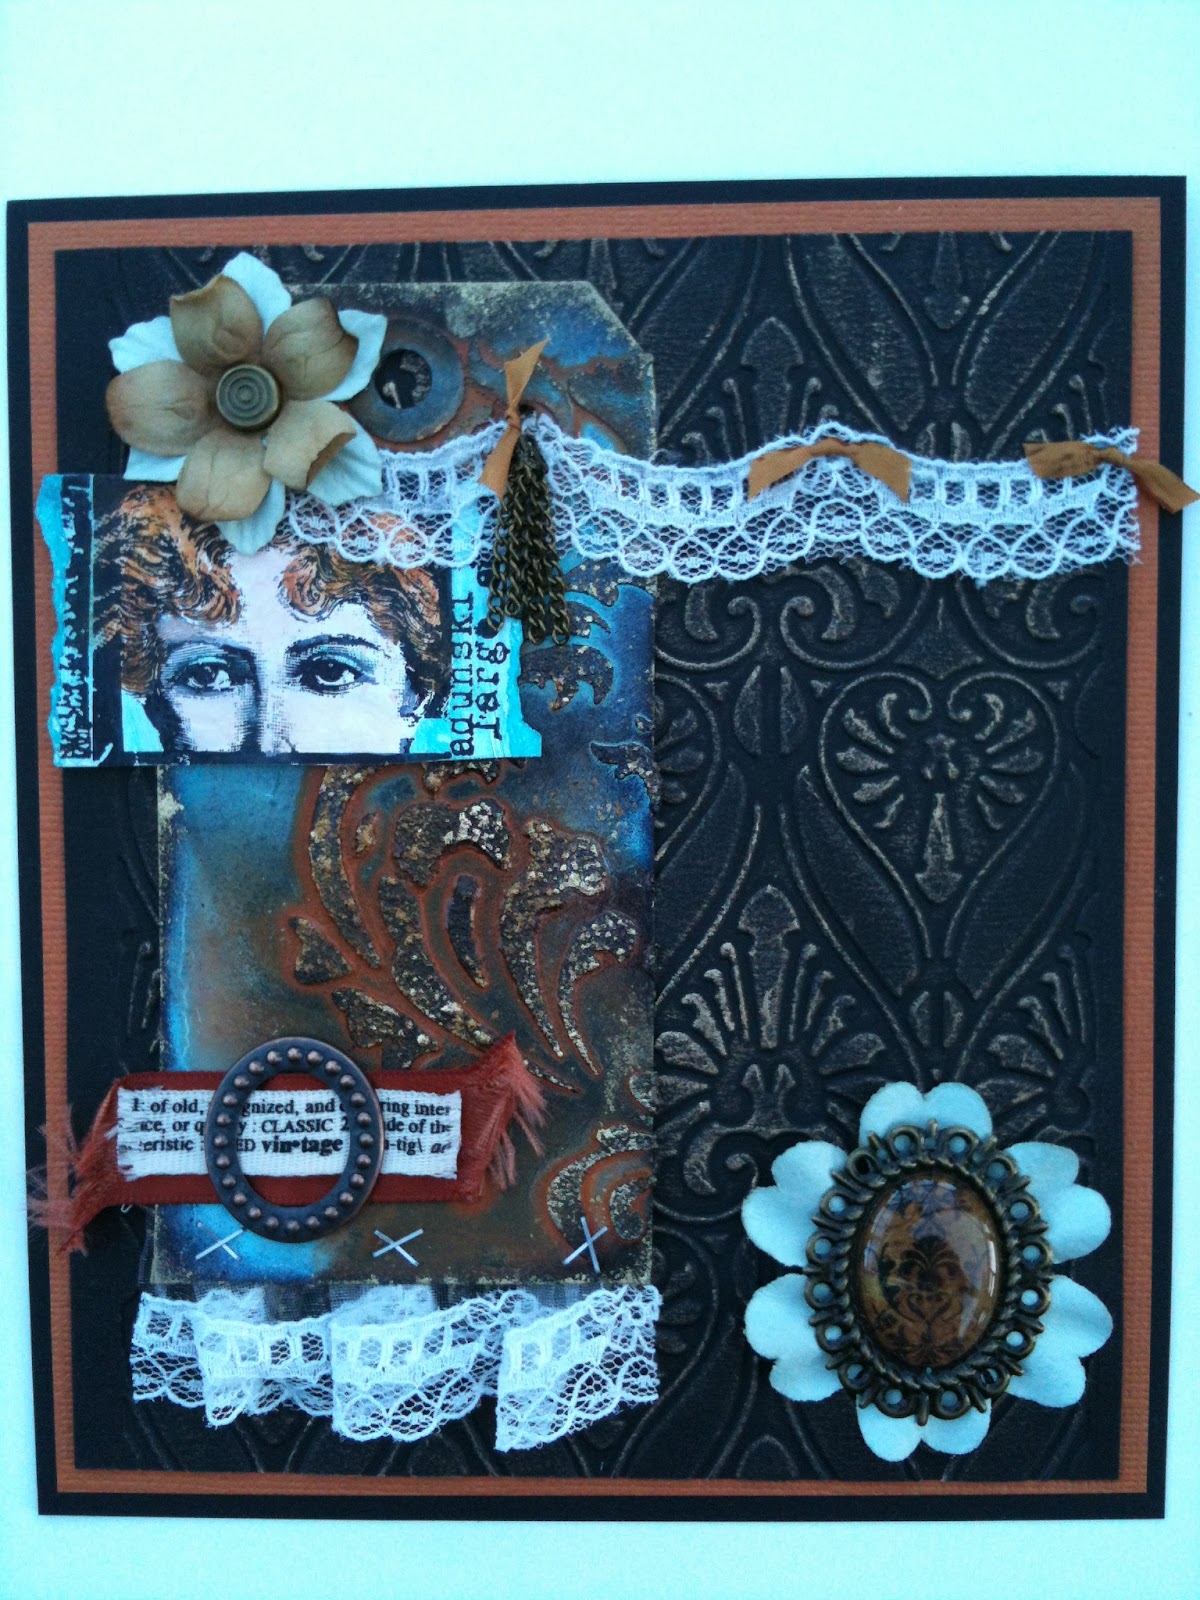
The final tag, the one with the script stamped into the Ferro, had the same treatment as the previous tag and of course the script is now visible!


25 comments:
Stunning techniques. Looks like I may need some f this lusciousness too... oh dear!
Oh no! Now I need Ferro AND Liquid Leaf!!! And I was trying to be so good! These are tags are luscious!
Looks fab, partic liking the blue and orange combo, very patina styley. Thanks for sharing all the loveliness of Liquid leaf with all the other yummo things!
Leandra
LOVE it,thanks for sharing, I sure have to see if I can get those products here in Holland... Maybe you know?
Ellie, if you can't find them in Holland, Paperartsy ship internationally with great shipping rates.
Lin
What a gorgeous tags. Love the finished creations a lot too. Keep staring at them. Wonderful layers and colours.
Margriet
Fabulous tags Lin and thanks for all the pics. Wonderful tutorial! Can't wait to visit PaperArtsy at Kettering. Pretty sure my plastic friend is gonna get a hammering, lol!
Hugs
Lesley Xx
Like them I love them. Gotta bookmark this for future reference.
hugs {brenda} xox
absolutely fabulous xxx
Thank you for sharing the tutorial! This is absolutely fabulous and the result stunning - now off to get some Ferro and gold!
Lin...
these look sooo cool.
you are amazing!
Luscious, indeed, your tags are positively yummy!
Thanks for the great step-by-step. :-)
Absolutely gorgeous, Lin! Makes me want to run to my workroom and play -- but I have to wait for my PA order to arrive with my stock of all these wonderful goodies! The package is on its way . . . .
In the second finished tag, what did you use to make that beautiful embossed background RHS (with all the hearts on it) -- so very pretty.
Talk to you soon, I hope.
Much love and thanks for such a super blog post --
Sal xoxoxoxo
Stunning tags!! Thanks for sharing your techniques with us all.
Love the finished projects and great 'how to' xx
I love them all.... Thank you for the great tutorial! Have a nice day!!! Hugs Susanne
Great techniques thank for all the details, cant wait to have a play :)
thanks for describing all the steps. the results are masterpieces and eyecandy!
These are stunning! Really gorgeous works of art! I really need to try these. Thanks for sharing the techniques.
Absolutely brilliant artwork!
Love the techniques shown in such a terrific way!
Greetings from Vienna,
die amelie x
OH MY, excuse me while I pick my jaw up off the floor...A MAZE ING x
Simply fabulous...looks like I'll need to get my crafty mitts on some Liquid Leaf. Love the damask stencil...do you have the deets?
Hugs, Pauline x
Wow, love your tags. You did an amazing job. I'm anxious to give some of your techniques a try. Thanks for sharing.
Stunning tags Lin. Thanks so much for sharing all this information with us all. Karen.x
Found your post via Pinterest. LOVE all the texture and the layers. Thanks for sharing your process...that's the best part (next to the finished art!)
Inky hugs,
Angi
Post a Comment