
 To start making your flower, you will need to cut one of each flower from a piece of aluminium.
 Next step....make the centres of the flowers. Leaning on a foam mat, use a ball & cup tool to emboss a crater in the centre of each flower.
Now leaning on an acrylic mat, flip all the flowers over and use the cup end of the tool to refine the bumps.
 Back to leaning on the foam mat and working on the back of the flowers, use the the very skinny embossing wheel from the basic set of tools to emboss lots of lines, starting in the centre and working out towards the edges.
 This is how they look from the front when you have finished the embossing..........pretty cool...huh?
Now slather them with a black Paint Dabber.
 Leave to sit for about 30 seconds and wipe off the excess paint......this is how it will look.......all grungy and vintagy.
 Thoroughly dry the black paint and apply some of Tim Holtz Adirondack alcohol ink. I used stream for these flowers but edged them afterwards with a little bit of Purple Twilight.
 On the Scalloped Flower I used Stream and Purple Twilight together.
Look how pretty they are all stacked up......now to make them more dimensional.
 Start with the smallest flower and snip between each of the petals.
 Lift all the petals upright.
 Now bend each corner of each petal back, shaping each one into a soft, curved shape.
 Repeat this process for the other two flowers.
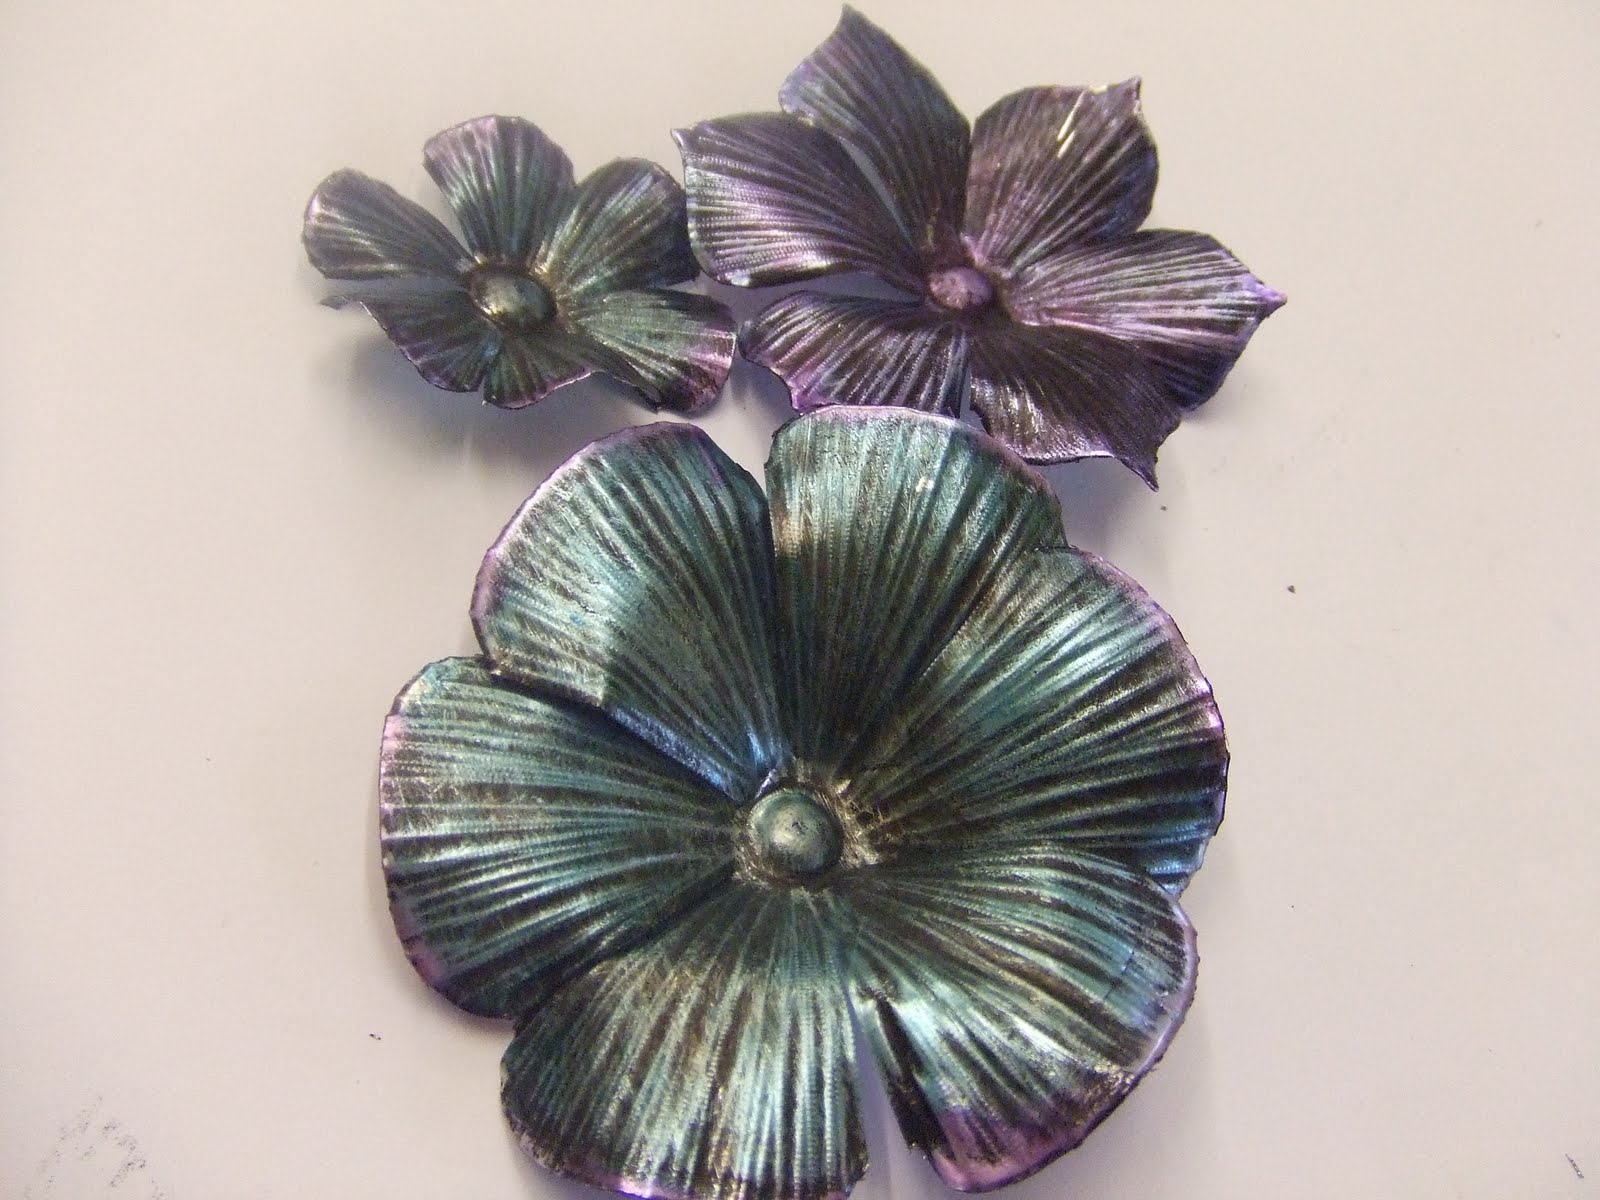 Use either silicone glue or hot melt glue to assemble your flower.......I'm in love with these flowers.....I hope you love them too.
 See you tomorrow for a viariation on this flower.
Have a creative day, Lin


19 comments:
I think I love this even more than yesterday's, it is sooo gorgeous!
wow these are gorgeous.
Mmm! Gorgeous..as was yesterday's too :)
xoxo Sioux
Just gorgeous........ as were yesterday 's.
Love these flowers, just my colours, and the step by step instructions are brilliant, thank you! Judith xx
Totally fabulous flowers. Annette x
Thanks for both tutorials Lin, the flowers are fantastic.
Totally, TOTALLY, Brilliant!
~Linda
Like ??????? LOVE!!!!!!!!! The flower is just gorgeous, as was the one yesterday. Love the way you show the step by step photo's and make your tutorials so easy to follow. Thanks! x
another gorgeous flower and a another great tutorial, thank you
hugs
Absolutely scrumptious.
Hugs
Valxx
WOW oh WOW these are fabulous
Wow, you make the flowers look amazing.
I totally LOVE them!!!!!
A wonderful step by step tutorial, Lin, I hope someone who
knows how to - sadly i don't - recommends your blog for an award! Your tutorials are always great and eagerly awaited! Can't wait for tomorrow! Chris
Gorgeous flower and great explanation.Love the combination of the creative design and the realistic feel.
Margriet
yup, absolutely in love with them. wonderful. tfs.
Wonderful! I really love these flowers!!!
Absolutely stunning, can't wait to give this a whirl! Beautiful! Thanks for the lovely tutorial.
Post a Comment