I'm still liking the Tim Holtz Tattered Leaves die and thought I would re-visit a technique that Tim showed me quite a few years ago using die cuts and metal adhesive tape. It's a lot of fun and the possibilities are endless.
 I took a wooden frame and canvas and painted them both with Rangers Black Acrylic paint dabber. Once dry, I added some gold and copper highlights to the frame.


Now to start work on the tags. First of all die cut some of the Tattered Leaves and stick them to a tag. Trim away any parts that are hanging over the edges of the tag.
 Next cut a piece of metal tape slightly bigger than the tag. Please be aware that this stuff is beyond sticky and it is not a good idea to remove all the backing tape in one go as it can curl up on itself and make a big fine mess. Here's a little trick to help you avoid that. Remove the backing tape from the top right corner, bend over the metal tape and stick it to your craft sheet. Do the same to the bottom left corner, then when it is held in place on the craft sheet, remove the rest of the backing paper.
 Place your tag with the die cuts face down on to the sticky side of the tape. Turn it over and rub firmly with a paper stump to smooth out any wrinkles and to highlight the die cut shapes.

Use a pointy TSS tool to outline the images.
 And to draw some details on the leaves.
 Cut away the excess metal from the corners and fold the rest behind the tag for nice neat edges..
 Take a brass brush and scrub the background metal using a circular motion. This will roughen the surface and any paint that is applied will stick better to this roughened surface.
 Apply a coat of black paint dabber over the whole tag.

Take a paper towel and wipe away the excess.
 I also like to polish up the leaves, it makes a nice contrast against the rougher background.
 I then used Terra Cotta, Pesto and Raisin alcohol ink over the whole tag, I love these colours for an autumnal look. I used the same technique for the other tags using Tim Holtz Market Place alphabet die.

I also coloured some Ideaology pieces with Raisin and Gold alcohol ink, it completely changes the look of them

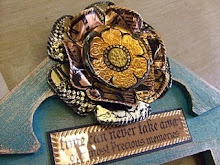
 Now a few close ups of some of the features which can be a bit difficult to see in the whole picture.


 And the final piece....enjoy!

 Next cut a piece of metal tape slightly bigger than the tag. Please be aware that this stuff is beyond sticky and it is not a good idea to remove all the backing tape in one go as it can curl up on itself and make a big fine mess. Here's a little trick to help you avoid that. Remove the backing tape from the top right corner, bend over the metal tape and stick it to your craft sheet. Do the same to the bottom left corner, then when it is held in place on the craft sheet, remove the rest of the backing paper.
 Place your tag with the die cuts face down on to the sticky side of the tape. Turn it over and rub firmly with a paper stump to smooth out any wrinkles and to highlight the die cut shapes.

Use a pointy TSS tool to outline the images.
 And to draw some details on the leaves.Cut away the excess metal from the corners and fold the rest behind the tag for nice neat edges..
 Take a brass brush and scrub the background metal using a circular motion. This will roughen the surface and any paint that is applied will stick better to this roughened surface.
 Apply a coat of black paint dabber over the whole tag.

Take a paper towel and wipe away the excess.
 I also like to polish up the leaves, it makes a nice contrast against the rougher background.
 I then used Terra Cotta, Pesto and Raisin alcohol ink over the whole tag, I love these colours for an autumnal look. I used the same technique for the other tags using Tim Holtz Market Place alphabet die.

I also coloured some Ideaology pieces with Raisin and Gold alcohol ink, it completely changes the look of them

 Now a few close ups of some of the features which can be a bit difficult to see in the whole picture.


 And the final piece....enjoy!

Until next time, Lin


 I started by spraying some grey board with Crafty Notions Spraypaques, it just soaked right into the board and left a wonderful shimmer sitting on the surface. I also used these to spray the metal that I had embossed. One this was dry, I stamped the greyboard using Rangers Jet Black Archival ink and for the finishing touch to the metal, I used alcohol ink to remove the paint from the high points of the embossed images......I really love this look.