
I have been demonstrating at this show for many, many years, most of those on my own L.B.Crafts stand but since my .....ahem.....retirement, I have helped Mark and Leandra on the PaperArtsy stand. The show in recent years seemed different and less busy, the excitement, the buzz, the atmosphere had dwindled and after all the excitement building up to the show, I had felt a little deflated and disappointed afterwards and this was such a shame as it's the biggest show of the year. Well, let me tell you......it's back!!! Oh my giddy aunts!!! The place was packed.......excited people by the bus load.........the placing was buzzing and Leandra (who had no voice , bless her) and I demoed our backsides off all day, right up until the show closed. Well, actually that's not entirely true as we managed to get a break for half an hour as the lovely Darcy and Michelle took over for a spot of guest demoing and what a sterling job they did too.
It was sooooo busy, Fresco Paint, Grunge Paste, stamps, stencils, Treasure Gold, all flew off the stand at the speed of light and people were four deep around our demo desks at some points during the show as well as people behind us.......just like it used to be!!!!! Anyways, I didn't take any photos of things I made but I did promise to post a step by step thingy here of my latest way of creating a background, so here goes........
Working on a piece of PaperArtsy greyboard, I have applied some Grunge Paste with a palette knife through two new stencils, Mini Cornflower and Mini Vine. Notice the colours of paint that I have selected, I have Squid Ink and Stone, two of the new colours which are both opaque. These will be my first layer of paint as I want really good coverage so that the Grunge Paste actually looks part of the board.

The other paints are Hey Pesto (my all time favourite colour) and Blood Orange. These are both translucent paints as I want to be able to see through these later layers of paint to all the layers underneath them.
This is a little idea I cooked up to make it easy for you to create a nice, balanced background. Many people struggle with this and end up with a muddy mess so if you follow a few simple rules, there will be no more mud for you!!!
Start with the Squid ink and Stone, painting a square of each colour in opposite corners.

Using a nice wide brush, drag some of the Squid Ink over the Stone and some of the Stone paint over the Squid Ink. If your paint has already dried, use a little more paint.This softens the blocks of colour.

Now this is very important!!!! You have to get into the habit of drying everything between the layers of paint, if you don't do this you will get mud. Once you are happy that everything is dry, you can move on to the next step which is creating a resist layer. Any of the pale color opaque paints will work but I really like using white so I always reach for Snow Flake. Using a small piece of Cut'n'Dry foam, sponge some paint through your chosen stencils on to the darker areas of your background. It is important to have a small amount of paint on your sponge so take out the excess on your craft sheet before applying to your work.

Don't forget to dry it all!!!

At this point, you need to grab yourself a clean baby wipe, this is quite a crucial piece of equipment!!!
I started my next layer with Blood Orange and painted it over the Squid Ink areas, then using my baby wipe, I dragged the colour down over the board, fading the colour away. You will notice how amazing it is to see the Snow Flake paint showing through. It does take on a hint of the colour that you have painted over it but you can still see it.
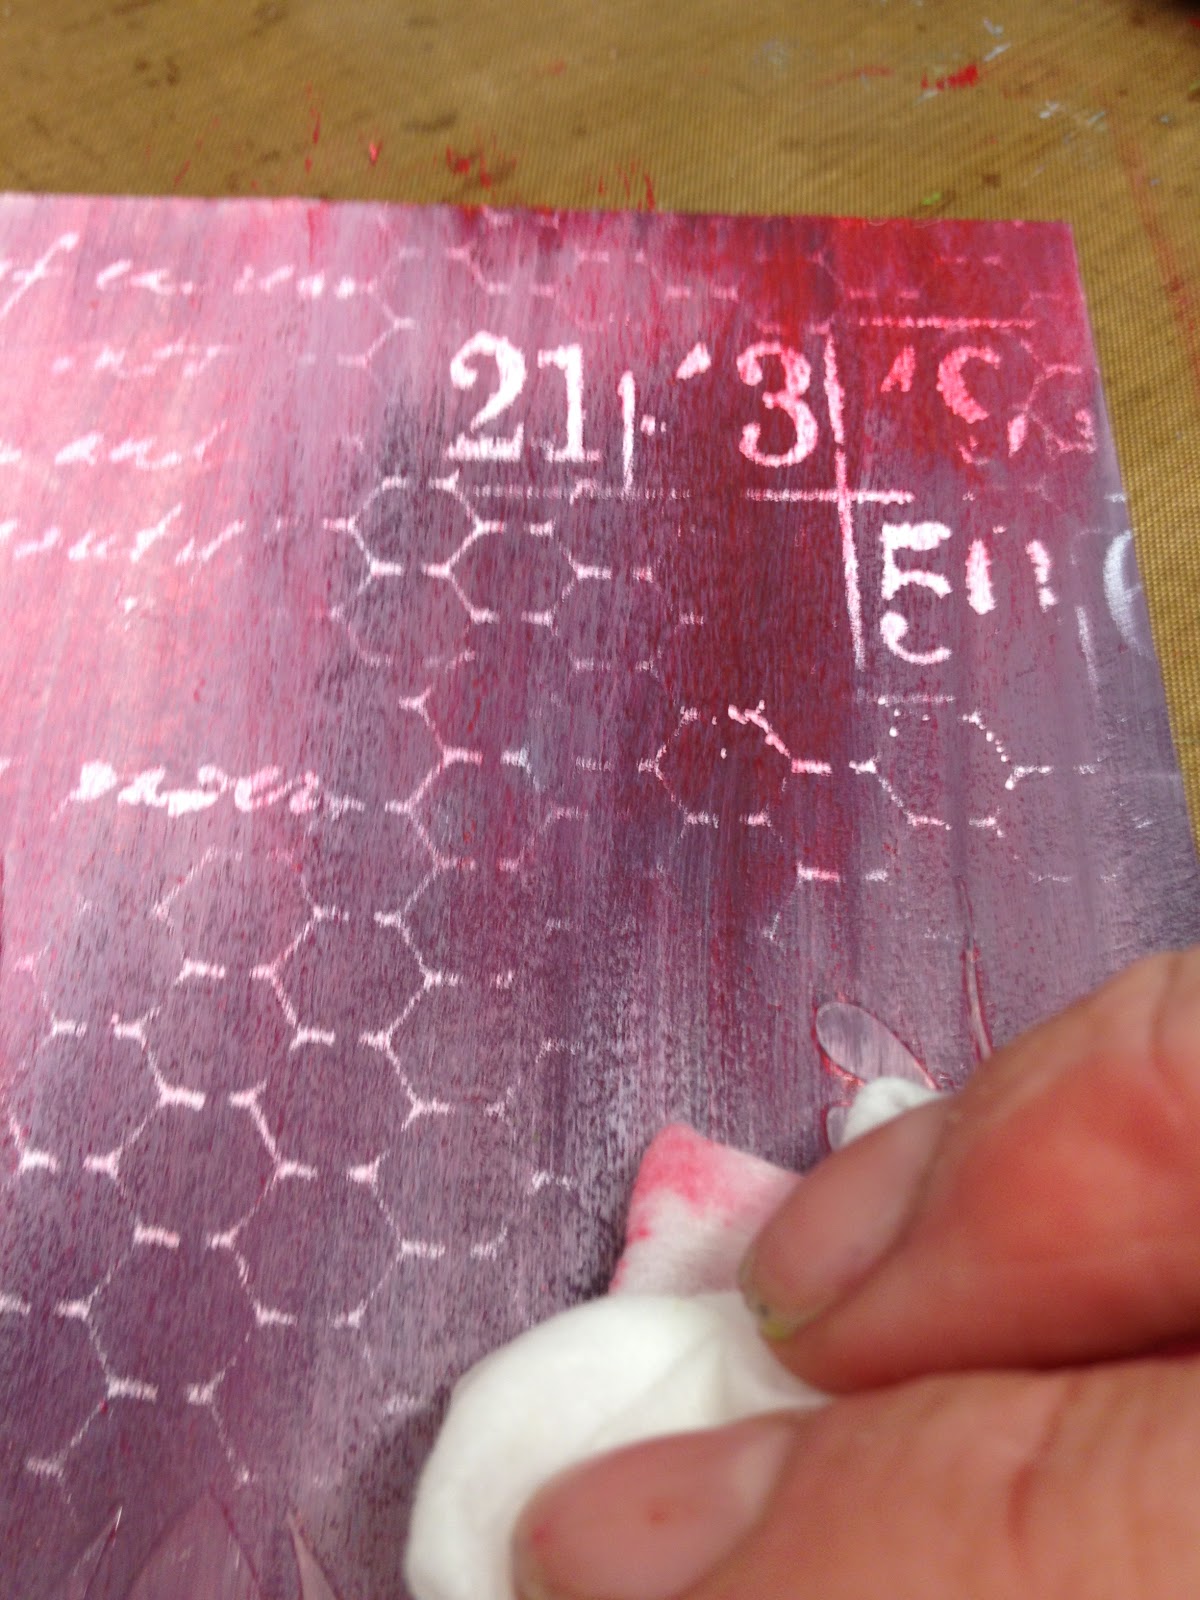
Now dry this layer!!! One of the things I love about paint is that if you have remembered to dry the layer of paint below and you are not happy with the colour of the next layer, you can generally wipe it away if it has not already started to dry.
Next up, Hey Pesto. Repeat the painting and baby wipe technique with this second translucent colour.


Then give it a good dry with your heat gun.

I think you'll agree that this is all pretty simple and achievable but it just needs a bit of stamping

and a bit of pizazz.
When I was at Ally Pally, I was showing everyone how to add a bit of bling with a few foil accents. Sadly I couldn't add this stage to this piece for you as I left my WOW Bonding Powder and foil in the demo desk at Ally Pally but basically you use the Bonding Powder in the same way as regular embossing powder and when you heat it, it becomes sticky and you can simply press the foil on the sticky areas. I'll show you properly when I get my kit back! In the meantime, we will move on to the magic powers of Treasure Gold.
Oh my, how I love this stuff, it really is magic in a jar. It can liven up the dullest of dull projects in an instant!
Here I have, Aquamarine, Spanish Topaz, Onyxite, Green Amber and Rennaisance.
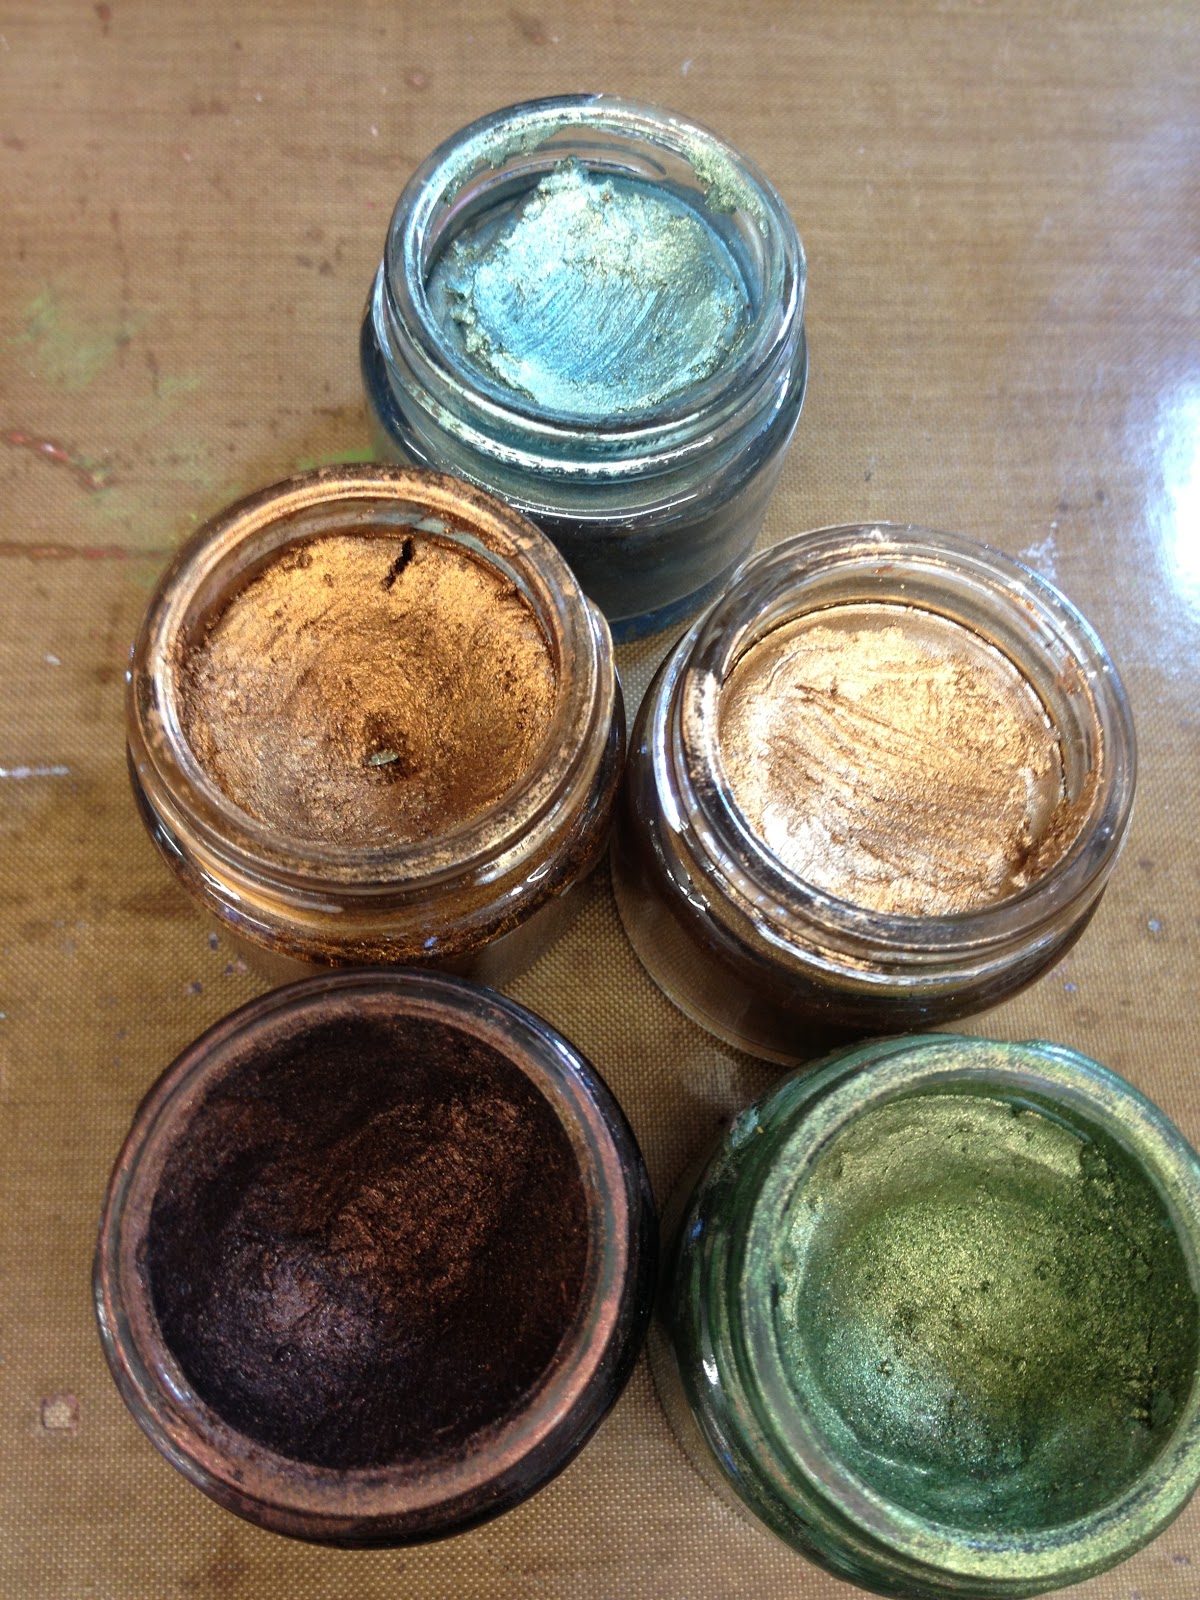
It's not that easy to do justice to this product in a photograph but I do hope you can see just how amazing it looks when just a small amount is brushed over the raised up areas on the Grunge Paste. I usually start with the darker colours and layer them up towards the lighter colours. When you are happy with the effect, just give it a little polish with a soft cloth and it really brings up the shine......simply beautiful!

I do also like to dry brush a smidge of it around the edges of my work too.

This is something that you can all achieve, just remeber a few simple things:
Start with opaque colours.
Use an opaque colour as a reist.
Use translucent colours for the upper layers and blend with a baby wipe.
Dry between layers.
OK, that's me for tonight, I'm off in search of some chocolate.
EDIT
Just a quick note from me to answer a couple of questions.
1. I used the Blood Orange straight from the bottle, it doesn't need watering down as it is already translucent. The wet baby wipe does the work for you but it does need to be a wet baby wipe.
2. The stamps I used are indeed PaperArtsy, the splatter is Mini 72 and the script is from ID09.
Lin


24 comments:
Thanks for getting this done so fast, Lin, I know you are still so tired after yesterday!! it was great to see you and Leandra again, and what a lovely tweetup we had to be sure. Roll on September...
I love the end result... Its gorgeous! Great tips Lin! Got to get myself some treasure gold... :)
Gorgeous :)
Happy craftin
Rebecca
ooh such a shame I couldnt make it this weekend but it sounds like it was busy (I have loved seeing blog friends posts this weekend on their purchases!!)
kyla
Hi Lin
What a lovely tutorial. Such beautiful colours and very helpful tips.
I wondered if the writing and splatter stamps you used are from Paper Artsy?
Thank you for your inspiration.
Best wishes,
Margherita.
Hi Lin,
You are so good getting this to us so quickly, you are the best. Can I ask do you water the blood orange layer down as mine came out very thick today
Rachel
Must read this again for it to sink in, but the project is fabulous! So glad you had a great show!!!
~Linda
what a great tutorial Lin...oh I bet your feet are aching and probably every bone in your body too...have a chill out few days...hugs kath xxx
this looks fab, must have another play with my paints...so not got the knack! trace x
thanks so much for the step by step tutorial. I really enjoyed watching you demonstrate this beautiful background and so did my daughters. x Lavinia
Großartige Leistung und eine tolle Beschreibung...
Herzlichst Sophie xx
That is absolutely amazing. Thanks so much for the step by step... I always admire these pages and wonder how the hell they did it.. I love the end result... Just gorgeous.
It was lovely to see you and Leandra at the weekend Lin. I love watching your techniques, and thanks so much for this step by step. I'm armed with my goodies, I just need to put it all into practice now! Judith xx
Thank you Lin, that's a great tutorial. It's not quite as easy for us mere mortals as you make out :), but I guess practice (and playing) helps.
It looks gorgeous of course.
Probably one of my fave Ally Pally shows because we met so many lovely people - all at the PA stand lol. Thanks for the demo Lin - I always forget what I'm supposed to do - and also thanks for the chat about the textile course. I still don't think I have one locally but I shall keep checking!
ooh yummy work Lin, now I need Blood Orange and Squid Ink, couldnt have realised this yesterday when I was at the show could I!!!, also converted onto treasure gold, but only got one pot, grrr, but dont worry we know I'll soon get some others. sorry I missed you on Saturday xx
Gorgeous project Lin, I love that colour combo ! Sue C x
what a fabbie piece of art, just loving the mix of colours that you have used
hugs
Now that is a brilliant tutorial! Thanks Lin, I shall be trying it out on my lot post haste...
Utterly lush!!!!! Love your work so much.
merci pour ce pas à pas c'est magnifique!
Had a fab day at Ally Pally and enjoyed watching you and Leandra demo, thanks for taking the time to do a step by step .... must remember to be patient and let it dry x
love it! beautiful colors!!!
Thanks for this brilliant tutorial Lin. I couldn't go to the show this time and was so disappointed to have missed all the briliant demos on the PA stand. This sample is really lovely.
Hugs
Lesley Xx
Post a Comment