Friday, 26 November 2010

Flower Power......Day 2......Paperartsy dies

Day two of the Flower Power week sees the first of three variations of a flower using the wonderful Paperartsy dies. I have used the largest Grunge Flower, the Scallop Flower and the smallest Grunge Flower dies to make this very pretty and extremely dimensional flower


To start making your flower, you will need to cut one of each flower from a piece of aluminium.
Next step....make the centres of the flowers. Leaning on a foam mat, use a ball & cup tool to emboss a crater in the centre of each flower.


Now leaning on an acrylic mat, flip all the flowers over and use the cup end of the tool to refine the bumps.

Back to leaning on the foam mat and working on the back of the flowers, use the the very skinny embossing wheel from the basic set of tools to emboss lots of lines, starting in the centre and working out towards the edges.

This is how they look from the front when you have finished the embossing..........pretty cool...huh?


Now slather them with a black Paint Dabber.


Leave to sit for about 30 seconds and wipe off the excess paint......this is how it will look.......all grungy and vintagy.

Thoroughly dry the black paint and apply some of Tim Holtz Adirondack alcohol ink. I used stream for these flowers but edged them afterwards with a little bit of Purple Twilight.

On the Scalloped Flower I used Stream and Purple Twilight together.


Look how pretty they are all stacked up......now to make them more dimensional.


Start with the smallest flower and snip between each of the petals.

Lift all the petals upright.


Now bend each corner of each petal back, shaping each one into a soft, curved shape.


Repeat this process for the other two flowers.
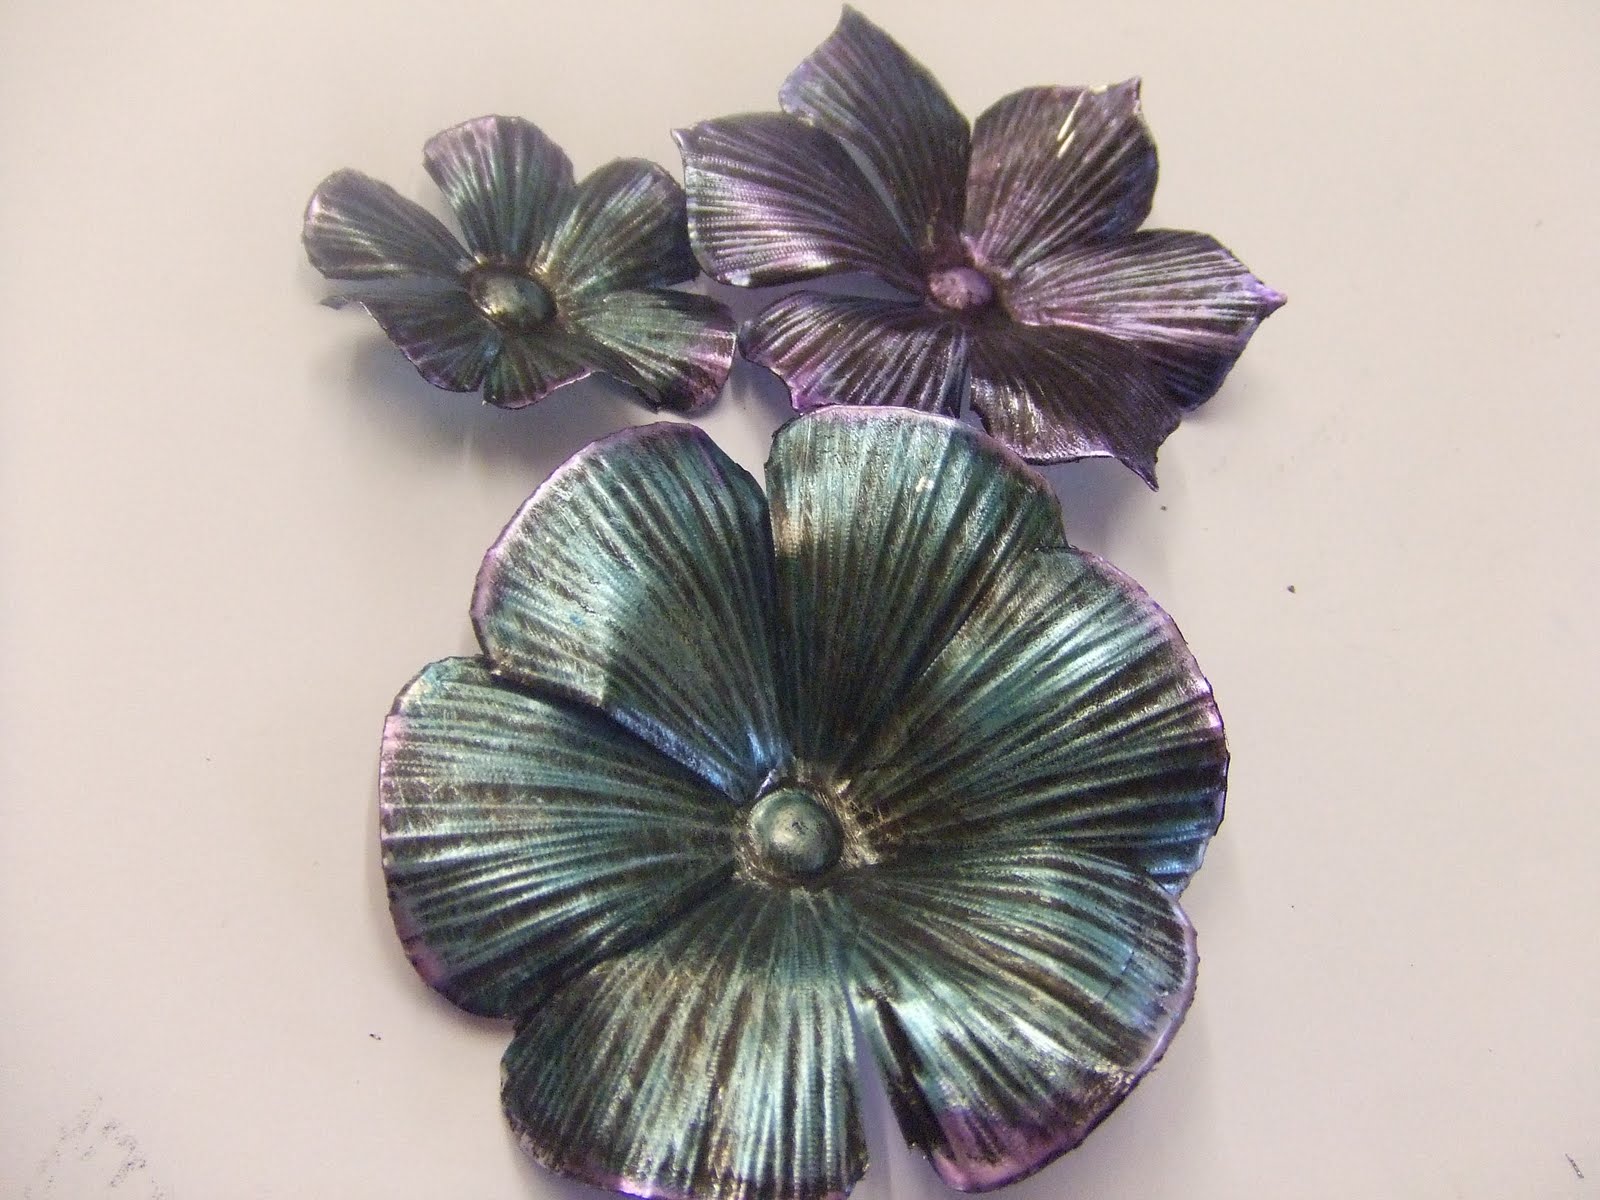

Use either silicone glue or hot melt glue to assemble your flower.......I'm in love with these flowers.....I hope you love them too.


See you tomorrow for a viariation on this flower.
Have a creative day, Lin

Wednesday, 24 November 2010

Flower Power.....Day 1....Tattered Florals

Here we are....day 1 of my Flower Power tutorials. This first flower is made using the Tattered Florals die designed by Tim Holtz. I know this die is out of stock on our website at the moment, there is huge demand for this die but we do have it on back order and you are able to pre-order one. I still wanted to post this tutorial as I know many of you already have it....so here goes!!!! I cut a set of flowers in my Big Shot from a sheet of Aluminium. You could of course use some of our coloured metal if you wish.
This little flower is made from either the smallest flower or the next size up. You will need a mat set (one foam and one acrylic), a ball & cup tool, a pointy tool and a couple of embossing wheels.
Leaning on the foam mat, use the ball & cup tool to emboss a crater in the centre of the flower.

Flip the flower over and now leaning on the acrylic mat, use the cup end of the tool to refine the ball.


I'm now using a very skinny embossing wheel (this one comes in the Basic Set from Ten Seconds Studio). Starting very close to the ball in the centre of the flower, simply emboss a series of straight lines working out towards the edges of the flower.


To add a finishing touch, I've used the diagonal wheel (Wheel Set C) to edge the petals of the flower. Now this is quite important....when I'm edging something, I'm not leaning on my soft mat as this would deeply emboss it. I'm actually leaning on a wad of scrap paper, this way, it flattens down the edges at the same time as adding a pattern.


Moving on to the daisy style flower, I used my pointy tool (from the Basic Set) to draw a scribbly, scribbly design on the petals and for this I am leaning on a foam mat.

Flip the flower over and still leaning on the foam mat, use a paper stump to gently emboss the centre of the flower, it will create a nice dome shape and you may find that the petals start to rise up in the air....don't worry, you can always bend them back if they get in your way.


To add texture to the centre of the flower, I used my pointy tool to adds lots of dots (fondly known as the dotty, dotty technique!) for this, you still need to be on the foam mat and still working from the back.


For the largest flower, I used an embossing wheel (wheel set D) that looks a bit like a perforating tool. Again, leaning on the foam mat and starting in the centre of the flower, emboss lots of lines working out towards the edges of the flower.


Now comes the painting part. I like to use Rangers black paint dabber for this. Simply add a layer of black paint to each flower and after about 30 seconds, take a paper towel and remove the excess paint. You will now have an antique look to your flowers which is an attractive look in it's own right but you could of course pretty them up too!!!


I used Tim Holtz Adirondack Alcohol Inks to color my flowers. I used Stream and Purple Twilight.


Finally, you can layer them up in all sorts of combinations and shape the petals as the metal is soft , this one just uses the two largest flowers. Now, because these flowers do not have card on the back, gluing the layers together can be a bit tricky. I used silicone glue for these but you could also use hot melt glue........but please BE CAREFUL......the metal gets HOT!!!!


I think you'll agree, these would make a fab embellishment for your art. Stop by tomorrow for day 2 when I'll be making flowers using Paperartsy dies.
Have a creative day, Lin

Tuesday, 23 November 2010

Thank you Tim....I had a blast!

I'm guessing by now that all of my lovely, lovely followers will have read the announcement from Tim Holtz on his blog yesterday. Sadly, Tim's Design Team is no more. Everyone who follows Tim knows that he has an incredibly heavy schedule, lots of travel, lots of classes, all his work for Ranger and on top of that designing new products to wow us, so it is no great surprise to realise that one man simply cannot do all this stuff.

I felt the need to use this blog post as a platform to publicly thank Tim for the opportunity, it truly was a privilege to be selected (the reality of it was that I was tickled pink!!!) and to be able to share my passion for what I do with all you guys. Of course the whole team are disappointed that our little dream has come to an end but without Tim adding our names to his blog roll, many of you would not have found us. So Tim, I enjoyed every minute of my time sharing my ideas with your products and of course will continue to do so. I would also like to thank everyone who left fabulous comments on Tim's blog following the announcement, they were all amazing!!

I've been working on a whole host of metal flowers this week and this one is using Tim's Tattered Florals die. I'm planning on having a flower power week with step by step instructions, there are four flowers in total, so I'll see you guys soon with all the details.

Thanks again Tim, I had a blast.

Lin

Monday, 22 November 2010

Third DT project for November

Here is my last Tim Holtz DT project for November. I decided to try and combine a diverse range of Tim's products in one project. My days of making cards are well and truly in the past and many of my regular customers and students now enjoy making more home decor items using the products that they only used for their card making.


I started by painting one of Darcies' frame kits with a black paint dabber and covered the back plate with a sheet of paper from Tim's Vintage Shabby pad of paper.

This combination of Distress Inks is one of my favourites, Crushed Olive, Rusty Hinge and Pumice Stone......very nice!!!!

Having sponged a light layer of these inks over the background paper, I then used some of Tim's masks to create a more interesting background. I actually sponged more of the same colours over the masks to build up depth of colour.


Then I die cut the Caged Bird from some Grungepaper and also coloured these with the same inks. The thing that brings everything to life is the addition of some stamping. I always use Rangers Black Archival ink for this, for me, I find that it is very black and I always get a sharp, crisp image. This is very important when using detailed stamps and I really do use a lot of script stamps, so this is just perfect.
How cute does this little birdy guy looks with his wing attached with a washer and tiny brad????


I've got a few close up shots now of some of the details. You'll notice that my frame now has a distressed look about it. This I did with Gold paint dabber, I wanted to get that shabby look on the frame and dabbers do it every time for me.
You'll notice that the die cut Elegant Flourishes are cut from metal. The bronze colour of the metal works really well with the Foliage and Sprockets from Tim's range of Ideaology.


I also used the banner from Tim's Regal Crest die. I use this banner on all sorts of projects, it's a really good size. Not too big so that it overwhelms the project but big enough for you to stamp something on it.


So off you go. Get out your Distress ink pads, some dies and some Grungepaper and have a little play....I'd love to see what you create!!!!
Lin

Sunday, 21 November 2010

Art Journalling ..... On Page Two

My Art Journaling class, On Page Two took place on Saturday with 12 lovely, lovely ladies returning with their journals that they started earlier in the year. Some had continued and created lots of scrummy backgrounds on their own, others had been a bit busy and decided to pick up where they left of last time they were in class, so everyone was working on something different which made it a fun class. Halina, Janys, Emma, Jean, Anne, Sue R., Sue C., Sue H. and daughter Jess, Karen, Linda and Fiona all arrived clutching their journals and all of them did some amazing pages and the best bit was that every page was completely different. This beautiful page belongs to Sue R. She had created a water colour background on the previous class but really wasn't happy with it. She decided to paint over it in a much darker blue and when it was dry, she stencilled over the top with Cloud White Versamagic ink. This picture does not do justice to have beautiful this page ended up. This is one of Anne's pages. She went on to decorate this page with the most amazing lettering, all zentagle doodling and everything....it was fab....just wished I had remembered to take a picture of the finished page!!
This page belonged to Sue H. Her background has the most amazing shimmer on it from the Crafty Notions Spraypaque sprays....it is going to be fabulous when it's finished.

The next page belongs to Jess, Sue's daughter.....it must run in the family......she really wasn't very confident at all to start of with, so she drew her design in pencil to begin with but wait to you see the finished background.......this deserves a drumroll.........


Way to go Jess!!!! Seriously amazing work!!!


I started out being good, taking lots of pictures then the day was over and I realised I didn't go back for the updated shots so here are a few of my WIP pages.


Enjoy the rest of the weekend, Lin.

Tuesday, 16 November 2010

class round up

I'm so sorry, I have been neglecting my blog a little bit of late. I've been really busy teaching classes and planning my schedule for next year. Not only am I planning my trip to CHA, we are working on classes for next year, planning when we should have our sale, organising Artsycrafts for 2011 as well as running the shop!!!!!

So here's a little round up of class information. On Monday 8th November a group of eight ladies travelled all the way from Holland to take my Printers Tray class, it was a thoroughly miserable day weather wise.....it could not possibly have rained any more than it did.....just awful but it certainly didn't dampen the spirits of these lovely ladies. They must have been exhausted by the time they got home that night but they all did a great job with their projects so hopefully it was worth being tired!!! Another big class this week saw 10 lovely ladies taking part in my "Paperartsy meets metal" class. It was the first time I had taught this class and they all did an amazing job to finish the complete project. So thank you Anna, Christine, Penny, Sue, Jill, Sweta, Karen, Allyson, Toh ee and Mel.....you all made it a fun day.
Here's a close up of Jill's work in progress.

I think these hands belong to Sue....she' antiquing her embossed copper strips.


Penny is now know the queen of goop (Inka Gold)....she's addicted to the stuff and here she is hogging all the goop for herself!!!! Sorry Penny, I couldn't resist, I know you didn't really hog it all.


And this is the class sample of what they made.


A couple of close up shots.

It's all things metal, Paperartsy stamps and lots of paint and goop.....all my favourite things!! Have you tried painting on the pearl metal with goop.....it's sooooo pretty!


Okay, so that's the review now on to cancellations. We have had a few cancellations and I have spaces on the following classes.
Saturday 27th November 2010 - Shabby Shack with me
Tuesday 30th November 2010 - Starter for six with Linda Elbourne
Tuesday 7th December 2010 - Art Journaling On Page Two with me
If you fancy taking any of these classes, details and pictures of the classes can be viewed on my website www.lbcrafts.com then call me or Karen in the shop on 01234 714848 to reserve your place.
Finally, I am continually being asked about the release of classes for next year......well the date for your diary when they go on sale is Saturday 8th January 2011. All details will be up on the website and on my blog as soon as they are finalised.
Have a creative day, Lin